Fall and Halloween craft fun for you and your family.
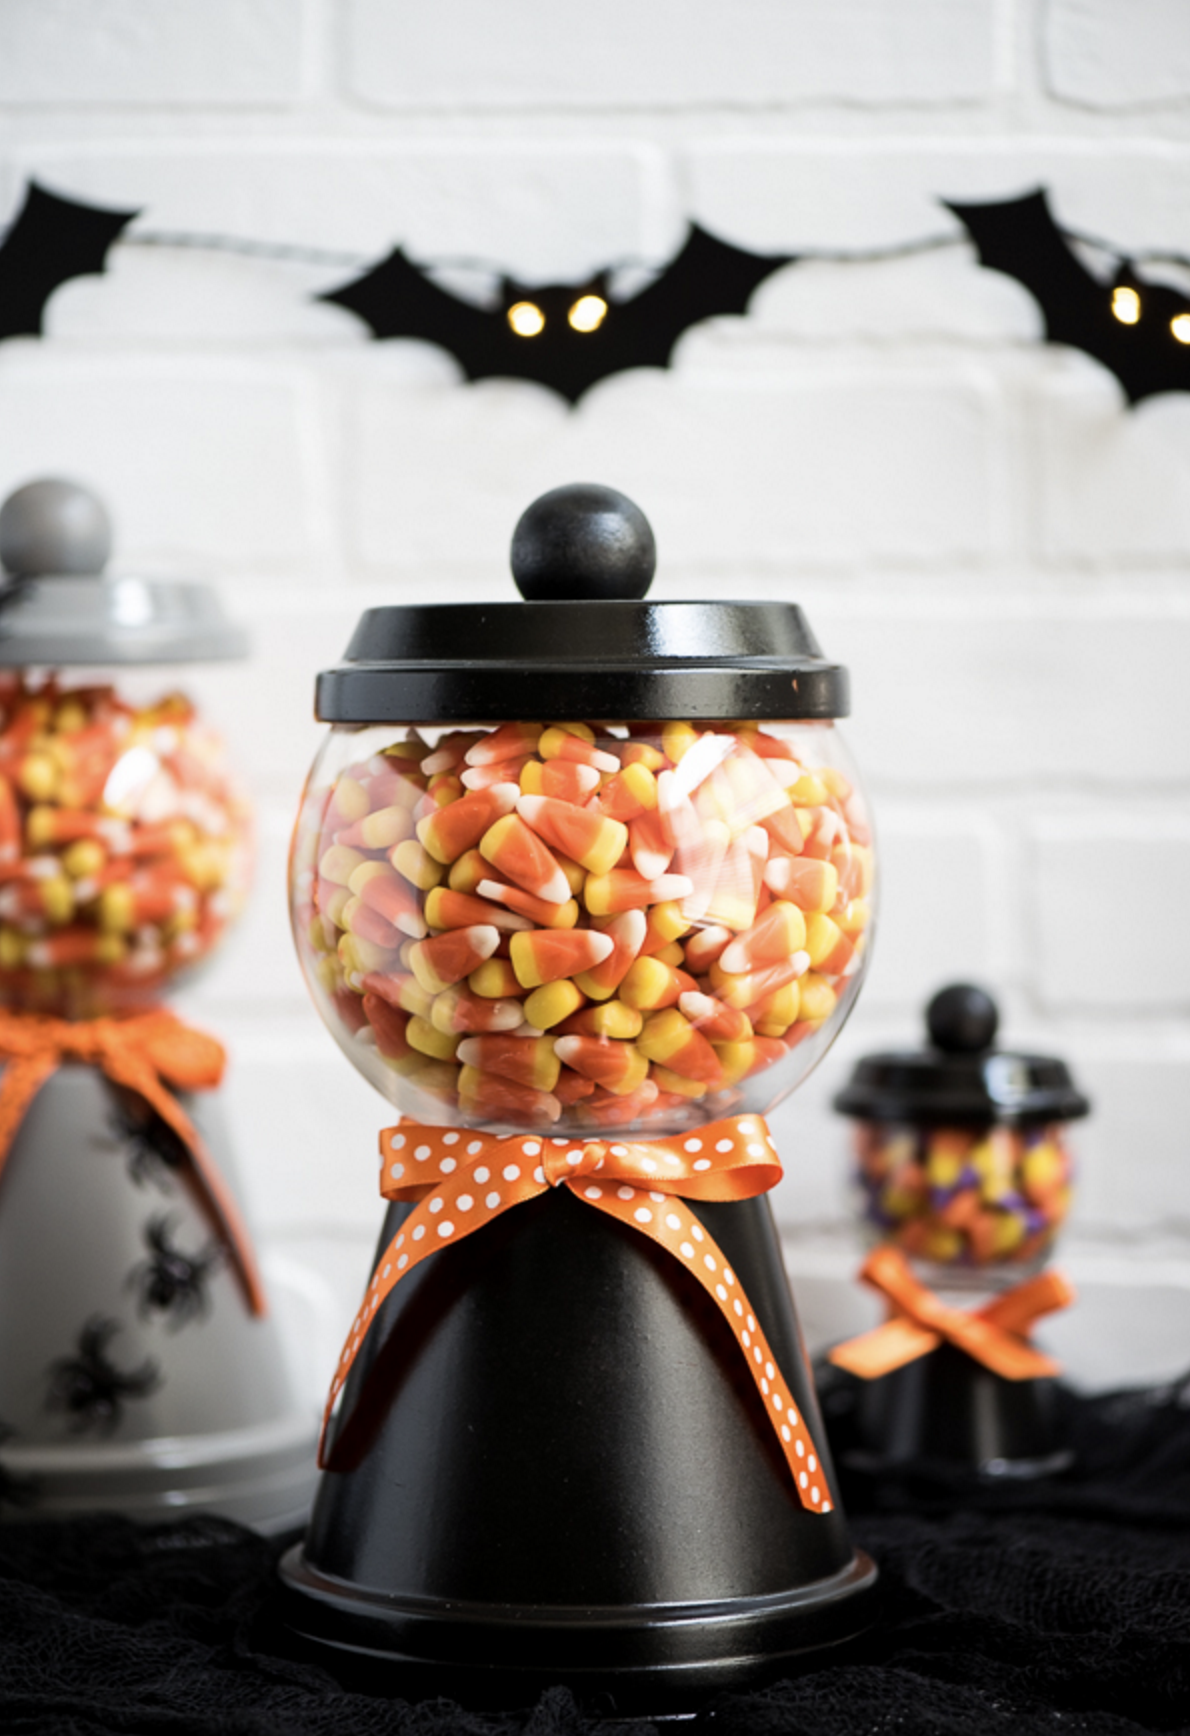
Halloween Candy Jar
Enjoy your candy and decorate with it too.
What You’ll Need:
- 6 inch terra cotta pot
- Terra cotta saucer
- Wooden knob
- Paint
- Ribbon
- Stickers, vinyl, etc. for decorating
Clear up space for your DIY projects by scheduling a free donation pickup of the unwanted items around your home — and remember, you’ll be helping America’s 
What To Do:
- Paint outside of the terra cotta pot, saucer and knob.
- Glue the glass jar to the terra cotta pot using e6000 or a similar industrial strength glue. Place a heavy book on top and let dry for at least 8 hours.
- Glue the knob to the saucer using hot glue.
- Fill your jar with candy and decorate with ribbon.
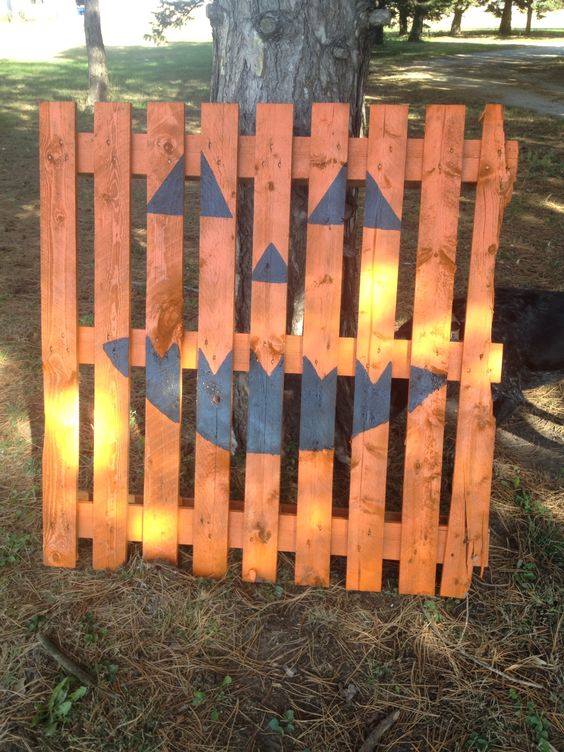
BOO-TASTIC 👻 Pumpkin Pallet
Before you clear out your backyard this summer of pallets and other DIY goods, check out this Halloween DIY to make October a BOO-TASTIC month!
What You’ll Need:
- Paint
- Pallet
What To Do:
- Paint your pallet any way you would like.
- Let your creativity soar in making your pumpkin’s face.
- Let dry and store until fall!
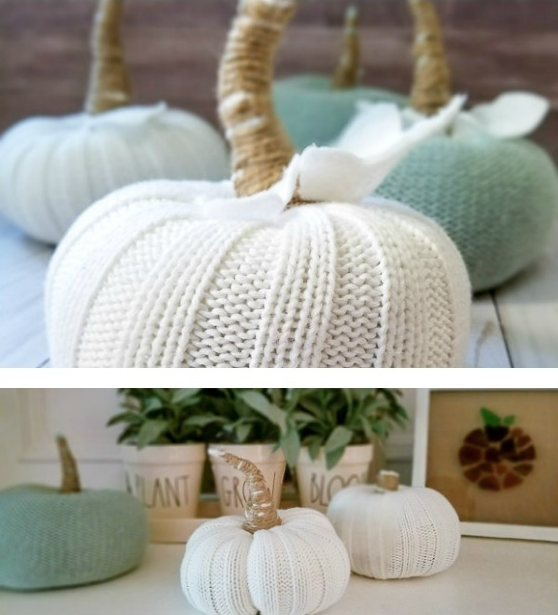
Sweater Pumpkins
Add a twist to your holiday pumpkins this fall that is sure to catch on and add fall flair to your home.
What You’ll Need:
- Sweater sleeves (your local thrift store is a great source)
- Rubber bands
- Dried beans (lentil or black beans are a good size)
- Polyester fiberfill
- Jute twine
- Glue gun
- Heavy duty needle and thread (optional)
What To Do:
- Cut sleeves off sweaters at the armpit. Cut sleeve in half. Turn inside out and wrap end tightly with a rubber band. Turn right side out.
- Add an inch or two of dried beans to the bottom. This helps pumpkin hold its shape and gives it a weighted base.
- Add polyfill about halfway up the sleeve.
- Tie top with rubber band as tightly as possible.
- Tie jute cord tightly around the rubber band.
- Cut corners off remaining sleeve to reduce bulk.
- Wrap jute twine as tightly as possible along the length of the stem we are creating. You will notice it getting narrower as you get to the end because we removed the bulk in the previous step. 8. Glue end of jute to stem.
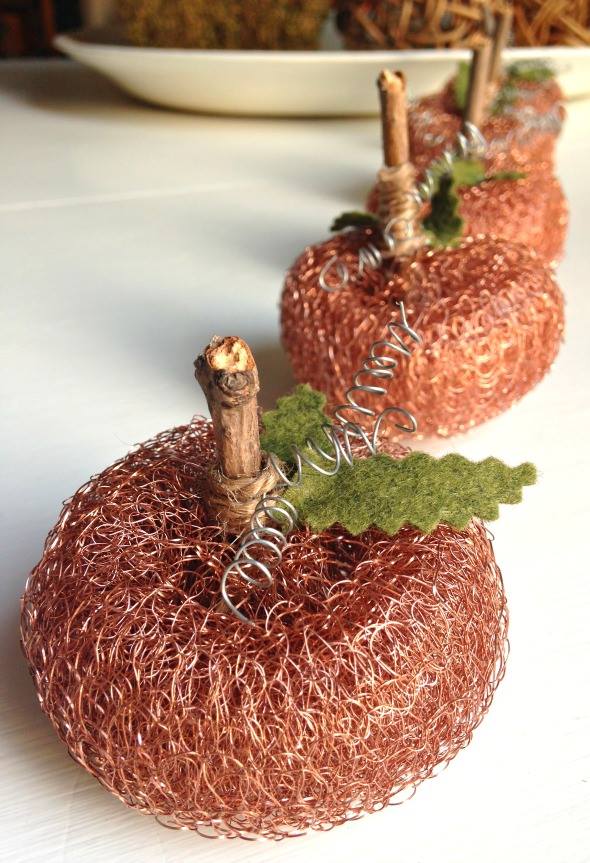
Pumpkin Scrub Pads
Clean up your kitchen in seasonal style this 🍁 fall!
What You’ll Need:
- One package (or more) of copper scrubbing pads
- Bits of thin sticks
- Scraps of felt
- Twine
- Wire
- Glue
- A thin paint brush
What To Do:
- Open & fluff up the pads
- Glue a stick to the center of the pad
- Glue twine around base of the stick (optional)
- Wrap wire around the end of the thin paint brush to create a curly vine
- Remove curled wire from the brush end
- Bend in half, put around the stick/stem and twist
- Cut 2 felt leaves with pinking shears
- Glue leaves to pumpkin
- Let dry then put them to use!
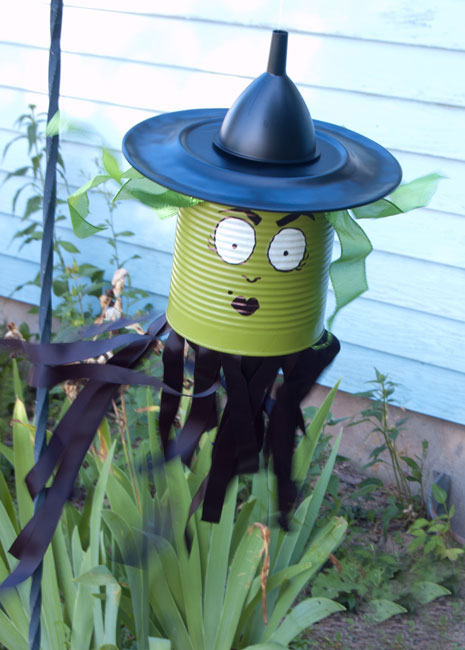
Witch Windsock
Halloween is in the air and there is no better way to enjoy it than with this fun and witchy DIY!
What You’ll Need:
- #10 Can – clean with label removed
- Green spray paint
- Plastic funnel
- Plastic plate
- Drill with 1/16 bit
- Black spray paint
- White craft paint
- Paint brush
- Black brush-tipped Sharpie
- Green ribbon for hair
- Black ribbon for streamers
- Hot glue gun & glue
- Fishing line
- Paper clip
What To Do:
- Paint the can solid green (you may need a few coats) then let dry.
- Slowly drill a small hole in the center of the plate. Move the sticker from the bottom of the plate over the center to help keep the drill bit from slipping.
- Spray paint the plate (both sides) and the funnel (outside only) black and let dry.
- Add the face to the can, you can trace on features or just go for it.
For the eyes: Paint two largem, white circles. They don’t need to be even in size, shape or orientation. After the white dries outline the eyes with the Sharpie and add eyelashes and pupils. Next give her some brows. - Give her a nose and then a mouth. You may have to repaint over the mouth with another coat of green.
- Cut the green ribbon into lengths about 2 inches longer than the can with an angle on one end. This is going to be her hair. Glue it around the top of the can.
- Cut the black ribbon 2-3x the length of the can, again at an angle. Glue to the bottom inside the can. Start in the back and work around to the front so if you need to overlap it’s not as noticeable.
- Drill or pop a hole in the top center of the can for the fishing line.
- Slip the cut ends of the fishing line through the funnel, through the hole in the plate and finally through the tin can. Tie a knot and side the paper clip into the loop to keep the knot from pulling through.
- Hot glue the plate down to the top of the can and then glue the funnel down to the plate.
Hang up your witchy woman and enjoy all season long!
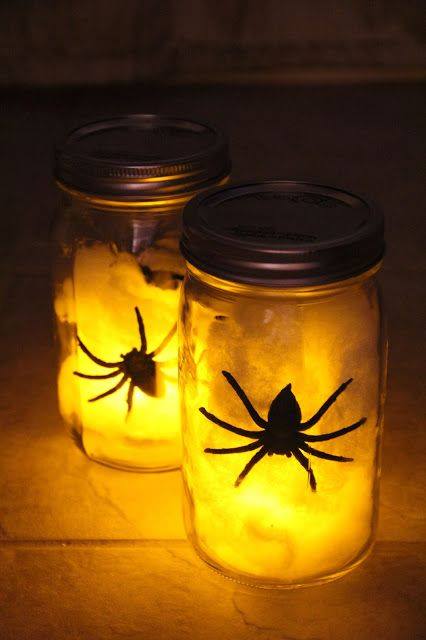
Spider Web Lantern
Get 👻 spooky with these easy to make 🕷 spider friendly jars. You’re not afraid of an eight-legged 🕷 cutie are you?
Need room to work on DIY projects like this one? 🤔 Why not schedule a contactless and free donation pickup of your gently used clothes, household items and other clutter today..it’s super easy, just visit 👉 pickupplease.org
What You’ll Need:
- Mason jar
- Cotton balls
- Battery operated teas light or glow stick
- Plastic spiders
What To Do:
- Place the tea light in the jar.
- Spread the cotton balls out into a web like look and drop in.
- Place the spiders where you would like.
Now get ready for the fun!
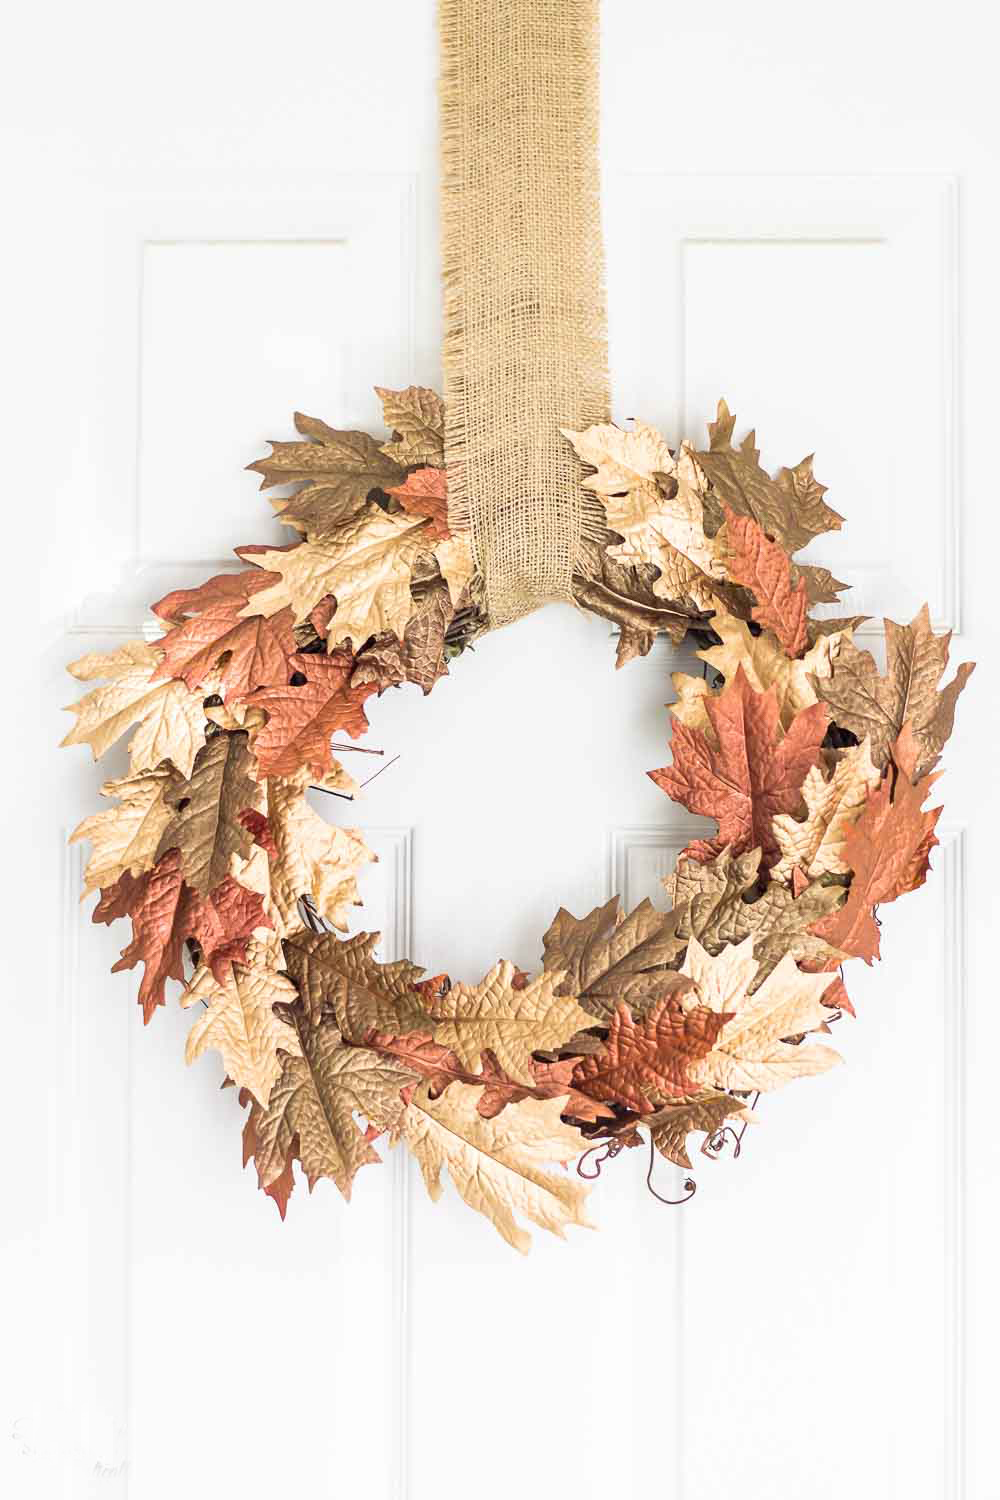
Metallic Brown and Gold Leaf Fall Wreath
Bring sparkle and flair to your doorway this autumn with this fun DIY.
What You’ll Need
- Grapevine wreath
- Pack of leaves (about 70 leaves)
- Worn penny paint
- Rich espresso paint
- Liquid gold leaf
- Hot glue gun
What To Do:
- Divide up the leaves into three piles and paint each batch with one of the 3 shades.
- Use a hot glue gun to attach the painted leaves to the grapevine wreath.
- Hang where you like!
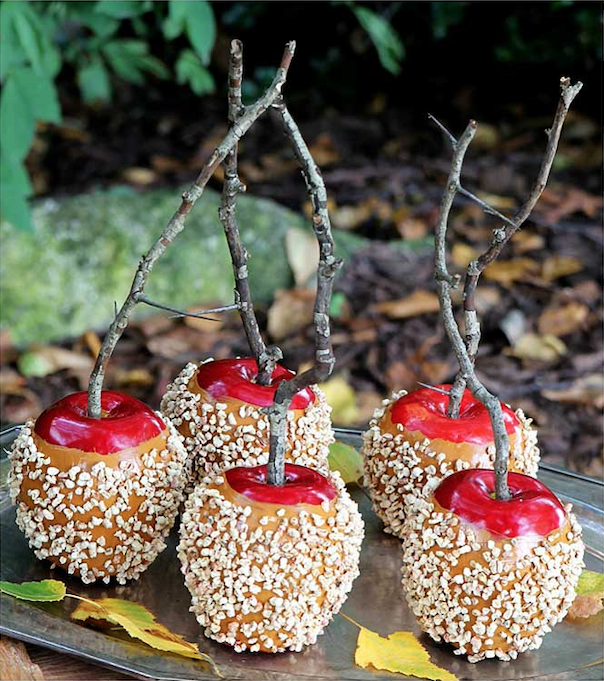
Decorative Carmel Apples
Add a little spice to your fall decor with this colorful DIY tutorial.
What You’ll Need:
- Fake apples
- Mod Podge in the glossy finish (8 oz bottle)
- Craft paint in a caramel color
- Corn cob guinea pig bedding
- Twigs, popsicle sticks or something similar to be used as a handle
- Ribbon if you want to get all fancy
- Wax paper or paper plate (not pictured)
What To Do:
- Remove the stem from your apple; it should just pull out.
- Use a spoon or tool to increase the size of the hole, in order to fit whatever handle you’re using.
- Insert your handle into the hole, and use glue if the fit is not snug.
- Mix your paint and Mod Podge together. For five apples use 1/4 bottle of Mod Podge (2 oz, since the bottle was an 8 oz bottle) and 1/2 bottle of paint (1 oz, since the bottle was a 2 oz bottle).
- Thoroughly mix the paint and Mod Podge together and paint it on your apple. Leave a rim around the top so you can still see a bit of the apple color.
- Generously apply your “nuts” (corn cob guinea pig bedding) while the apples are still wet and sticky.
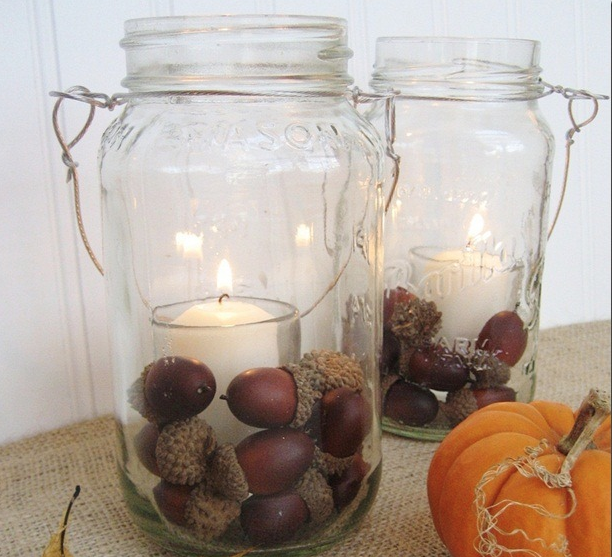
Mason Jar Candles
Here is a super easy and fun project to create and welcome in the fall season!
What You’ll need:
- A Mason jar
- A votive holder and candle
- Picture hanging wire
- A handful of acorns
What To Do:
- Twist a length of the picture wire around the mouth of the jar, making two loops at opposite sides and them twisting together at the back.
- Using a second length, make two more loops by threading the wire through the previous loops and twisting. This is the handle
- Slip the votive and candle inside. TIP: turn the jar sideways.
- Add the acorns.
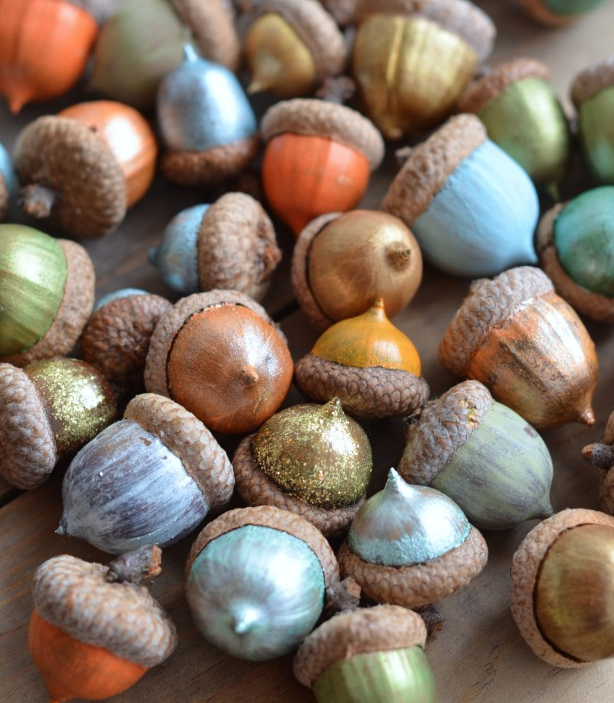
Acorns Aplenty!
Add a colorful accent to your fall centerpiece with these simple acorns that your kids can gather on their next walk.
What You’ll need:
- Acorns
- Acrylic paint
What To Do:
- Place acorns on foil-lined cookie sheet and bake at 170 degrees for a few hours. Slow bake them for about two hours just to be sure everything was good and dead.
- Use acrylic craft paints and a paint brush to paint your acorns. Brush strokes will make a difference in the acorns’ appearance so brush with the grain of the nut. One to two coats may be just enough. Let dry.
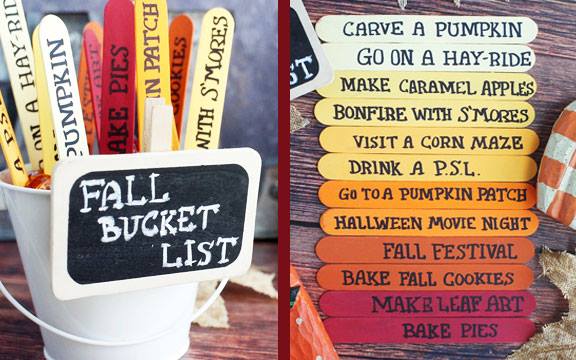
Fall Bucket List
Now that fall’s in full swing why not create this fun family 💎 treasure to create fun seasonal memories? Save your 🍡 popsicle sticks and paint and let’s get our love of the season going!
What You’ll Need:
- Bucket
- Small sign to clip onto bucket
- Paint and popsicles sticks
- Permanent marker
What To Do:
- Leave your bucket natural or paint it festive for fall.
- Let the family paint the sticks as you create your mini sign.
- Have a fun family night thinking about what should be written on the sticks.
- Start planning days and times to fulfill each bucket list item.
- HAVE FUN!!
America’s Best Donation Pickup Program


